
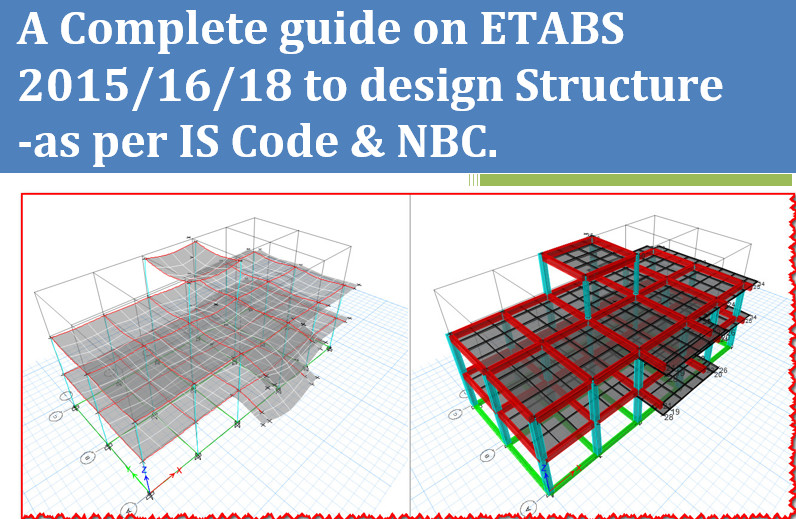
Step Wise Modeling…. Continue
Step 4: Defining & Assigning Slabs.
- Go to Edit tab
- Edit storey & grid system data
- Modify / show storey data
| Height | Elevation | Master Storey | Similar to | |||
| Storey 3 | 3 | 9.45 | No | Storey 1 | ||
| Storey 2 | 3 | 6.45 | No | Storey 1 | ||
| Storey 1 | 3 | 3.45 | yes | Name | ||
| P-storey | 3 | 0.45 | No | Name | ||
| Base | 3 | 0 | ||||
- Change Master storey P-storey =Storey 1 for Slab
- Change similar to storey 2 = Storey 1
- Change similar to storey 3 = Storey 1
- Refresh view
- Ok
Now
- Go to define tab
- Section properties
- Slab sections
- Add new property
- Property name : S 140 ( i.e. 140 mm slab)
- Slab material : M20
- Modeling type : member
- Under property data
- Type : Slab
- Thickness : 140 mm
- Ok
- Ok
- Note: before Assigning , change one storey to similar storey
- Now go to left side of screen & choose Draw Rectangular, floor/ Wall icon
- Property : S 140
- Close
- Select to joint between assign a slab manual.
Or,
- Whole select the object
- Then select beam
- Edit
- Edit shell
- Cookie wt floor option at selection
- Check ,Extend frame
- Apply
- Ok
Note: To assign irregular frame
- Select midpoint actual
- Select draw floor/wall icon from left side
- Select to column to mid point to column
- Similarly for other irregular slabs.

Note: To assign Staircase
- Go to define tab
- Selection properties
- Slab sections
- Add new property
- Under slab property data
- Property name: Stair 200
- Slab material: M20
- Modeling type: membrane
- Check, use special one-way /load distribution
- Thickness: 250 mm
- Ok
- Property of object
- Select : Stair 200
- Close
- Then manually assign for staircase slab

To change one way load distribution ( TO )
- Select the slab
- Go to assign
- Shell
- Local Area
- Rotation angle from defult orient : 90 degree
- Apply
- Ok
- Clear display assigns.
Defining & Assigning Sunshade/ Cantilever Slabs.
Define
- Go to define tab
- Selection properties
- Slab property
- Add new property
- Property name: Shade 120
- material: M20
- Modeling type: Shell thin
- Check, use special one-way /load distribution
- Thickness: 120 mm
- Ok
- Ok
Note: before Assigning , Sunshade replicate / offset beams to distance of 0.6 i.e. 600mm
To Offsetting:

First select the beams that you want offset with help of CTRL
- Go to EDIT tab
- Replicate
- Linear
-
-
- Dx = 0m
- Dy= -0.6 m(-ve for Global-Y dirn)
-
- Apply
- Similar for Inclined beam
- But , replication
- Dx =0.6 along X-dirn
- Dy= 0 m
Assign
- Select draw floor / wall icon
- Choose :shade 120 as property
- Close
- Joint
- Now delete beams actually
- Go to 3D vie
Step 5 : Discuss later
Step 6 : Defining & Assigning Shear wall
Example: Assign retaining wall/ Shear wall of 20 cm thick on 3 side

Define:
- Go to define tab
- Selection properties
- Wall section
- Add new property
- Property name: Retaining wall
- material: M25
- Modeling type: membrane
- Thickness: 200 mm
- All
- Ok
- Select : All stories from bottom layer
Asign:
- Select draw wall icon from left side
- Property : retaining
- Close
- Assign for wall on 3- sides
- Go to 3D for check

How To view only shear wall,
- Go to view menu
- Set display option
- Uncheck, beams & floor
- Apply
- Ok
Go to Plan,
- All stories
- Select the column that joint with retaining wall select this and delete

To go to previous view,
- go to view
- Set display option
- Check beam & floor
- Apply
(Note: To define that area is open space for this)
- Go to Draw floor/ Plan icon
- Property : opening
- Assign
Step 7 : Model View Option
Option 1:
- view
- Set display option
- Special effect
- Check, extrude frames
- Check, extrude shells
- Apply
- ok
Option 2: (3D rendering)
- view
- Show 3D rendering
Assigning loads
- Assigning dead& Live Loads
- Assigning the wall loads
- Meshing of Slab
- Assigning seismic load
- Assigning load combination
-
Assigning dead& Live Loads
Assign dead Load
- Go to plan view
- Select similar stories from bottom layer of etabs.
- Select the slabs that we want to assign to dead load (1.5KN/M^2) except Staircase slab & shear wall
- After selection
- Go to Assign tab
- Shell loads
- Uniform
- Put the value at load : 1.5 KN/M^2 ( For residential building D.L=1 as per Code)
- Load pattern name : Dead
- Ok
To assign dead load in staircase
- Select Staircase slab
- Go to Assign tab
- Shell loads
- Uniform
- Put the value at load : 5 KN/M^2 ( For residential building 3KN/M^2 as per Code)
- Load pattern name : Dead
- Ok
Now, go to Top storey by Up Arrow Icon
- For top slab (there will be water tank with capacity 10000 ltr) so we should change the value from Liter to KN & we should assign the load as a point loads at corners of slab.

- Before assigning & selecting the Joint
- Select One stories= Top storey from bottom layer of etabs
- Select the corner joints
- Go to assign Tab
- Joint loads
- Force
- Force : Global Z = -25 KN (from Calculation)
Assign Live load/Imposed Load
- Go to plan view
- Go to Assign tab
- Clear Display of Assign
- Change to Similar stories from bottom layer
- Select the slabs where you want to assign a live loads except ( Shear wall) make sure that staircase will be also selected .
- Go to assign
- Shell loads
- Uniform
- Load pattern name: Live
- Load : 5 KN/M^2 (For Residential Building: Chose Live<=3 if defined and put 5KN/M^2 for Roof ,3 KN/M^2 for Balcony & Stair and 2 KN/M^2 for other area as per Code)
- Direction: Gravity
- Ok
Assign Live load in cantilever Slab:
- Select Cantilever Slabs
- Go to assign
- Shell loads
- Uniform
- Load pattern name: Live
- Load : 2 KN/M^2
- OK
2.Assign Wall Load
- Go to Define tab
- Load patterns
- Load pattern name: Masonry
- Type : Super dead
- Self wt. Multiplier : 0
- Click on Add new load
- Ok
Select the frame line (Where you want to assign Masonry loads)

- Go to assign tab
- Frame loads
- Distributed
- Load pattern name: Masonry
- Uniform Load > load :12 KN/M ( wt = Gamma X Volume of wall)
- If there is Opening take 80% value (=12X0.8) =10 KN
- If there is Partion wall take =12/2=6 KN
- If there is partion wall with opening take=(12X0.8)/2 KN
- If there is parapet wall assign it also.
- Apply
- Ok